Customization
Header
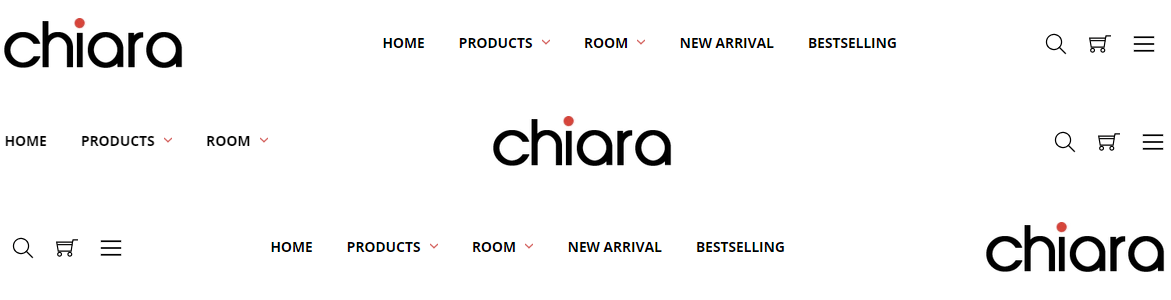
Theme supports 3 header with logo position left, right or center. It is configured in Theme Editor > Header & Footer > Logo position.
You can configure Header style, logo size, colors, fonts in Theme Editor > Header & Footer.
Mega Menu vs. Standard Menu
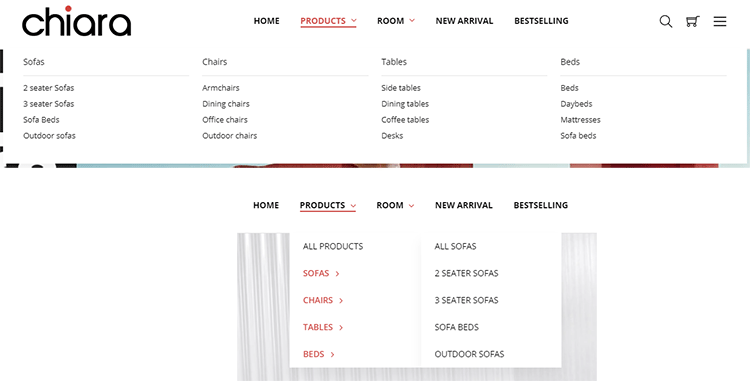
Theme supports both Mega Menu and Standard Menu. You can configure in Theme Editor > Header & Footer > Main Navigation > Navigation design.
The menu is automatically popuplated from your product categories and web pages (in Storefront > Web Pages). You can hide all web pages on this menu by tick on the option Hide web pages in main navigation in Theme Editor > Header & Footer.
Top Banner

You can edit the top banner on the homepage, category pages, product pages in Marketing > Banner Manager.
Footer
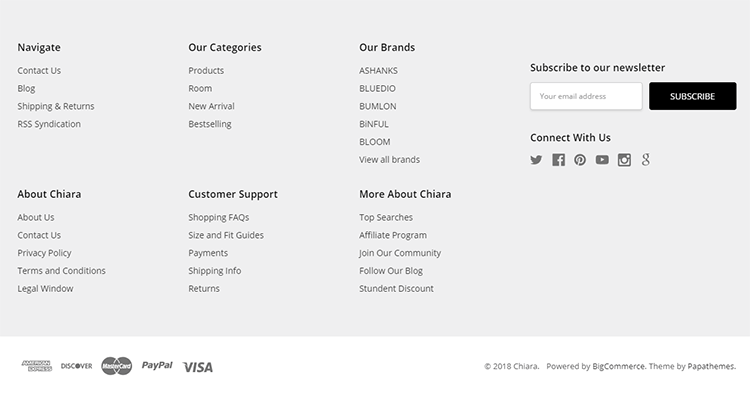
Configure the footer in Theme Editor > Footer section.
- You can change colors.
- Show/hide web page links, categories, brands.
- Add custom links in maximum 3 columns.
- Newsletter form support top or right position of the footer.
- Change colors of the copyright section.
- Show/hide copyright links.
- Show/hide payment icons.
Home Page
Customizing Sections
You can customize the content display on Home Page, rearrange content blocks, show or hide them from Theme Editor > Home Page > Sections.
Check out this video for quick start:
Main Carousel
Main carousel displays on the home page can be input in Storefront > Home Page Carousel.
You can configure carousel settings in Theme Editor > Home Page > Carousel section. Here you can turn on/off this carousel, configure colors, content position and so on.
Our recommended image size is 1920x770px.
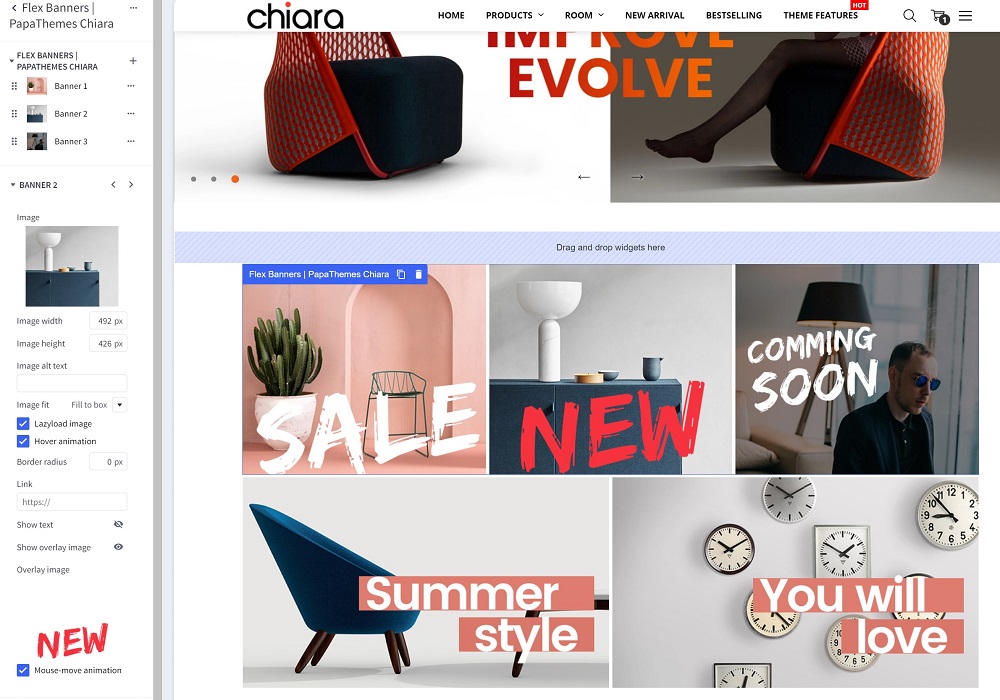
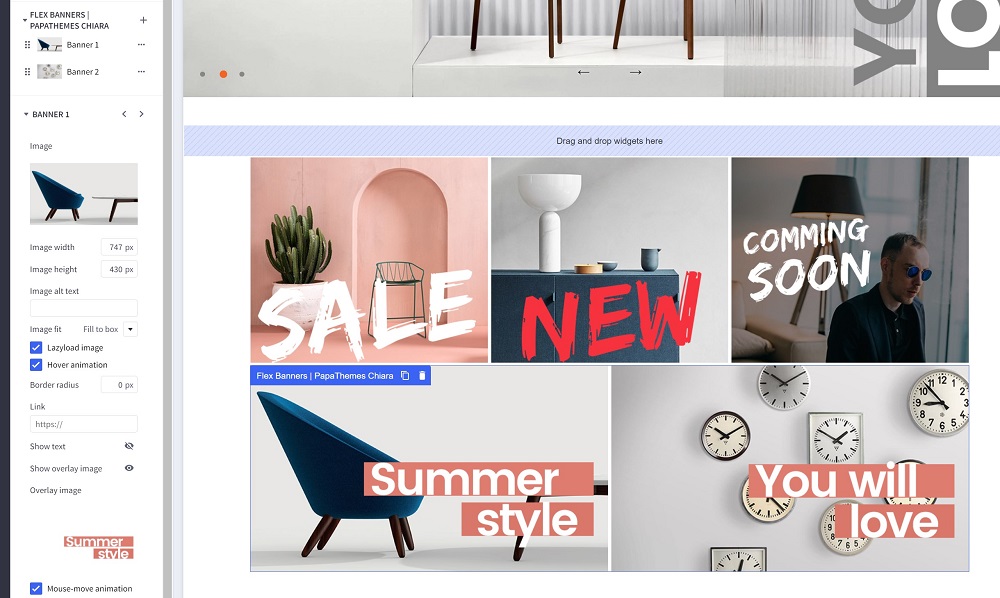
5 Banners below the main carousel
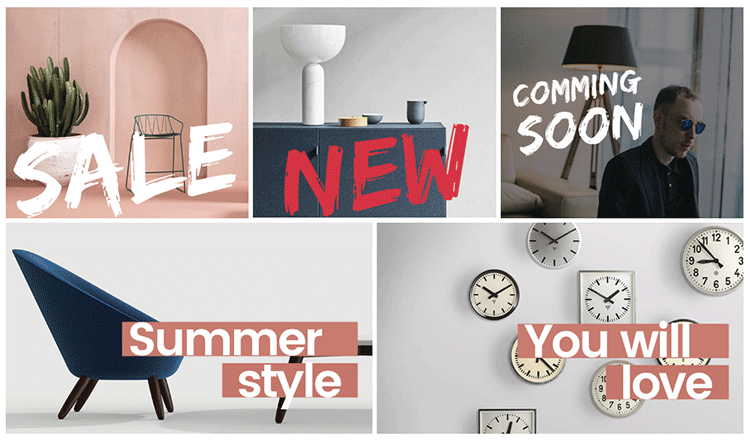
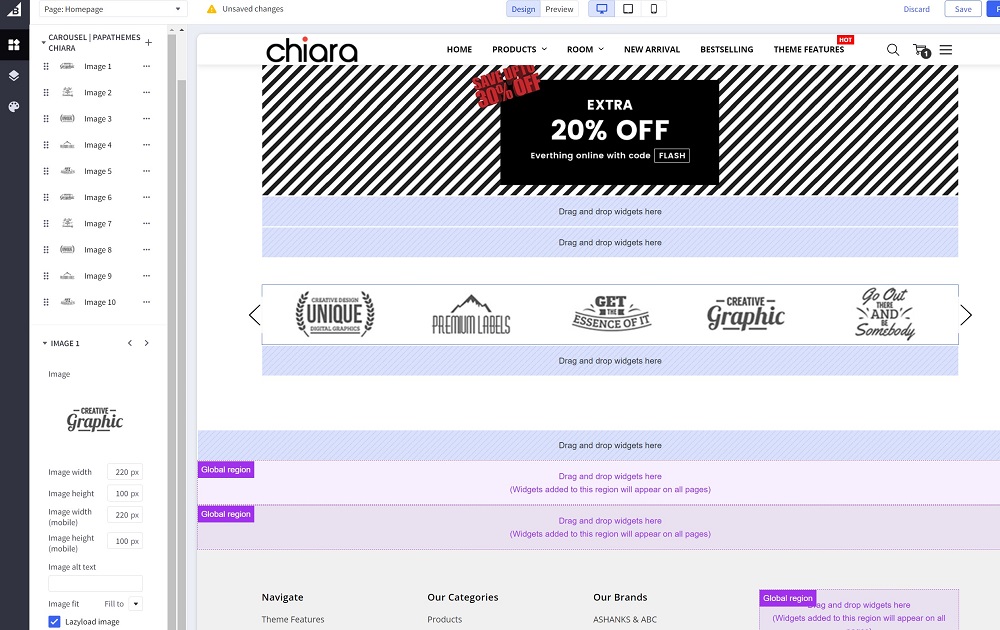
New Solution: Using Widgets
Install PapaThemes Widgets app to your store. In PapaThemes Widgets app, install all widgets.
Go to Page Builder > Widgets tab, drag and drop 2 Flex Banners | PapaThemes Chiara widget into a particular widget region.
Configure the widget like the screenshot below:
Old Solution: Using Marketing Banners
Create a new banner in Marketing > Banners.
- Banner Name:
5 banners below the main carousel (home-banner1) - Banner Content: Click on the HTML to edit HTML source.
<div class="chiara-section chiara-section--banners" data-local-banner-position="chiara-home-banner1">
    <div class="chiara-banners">
        <ul class="chiara-banners-list">
            <li class="chiara-banners-item"><a href="#"><img src="https://cdn7.bigcommerce.com/s-g0pakqdzwl/product_images/uploaded_images/furniture-banner1.jpg?t=1534872898" alt="496x496" /><img src="https://cdn7.bigcommerce.com/s-g0pakqdzwl/product_images/uploaded_images/furniture-banner1a.png?t=1534872899" alt="496x496" /></a></li>
            <li class="chiara-banners-item"><a href="#"><img src="https://cdn7.bigcommerce.com/s-g0pakqdzwl/product_images/uploaded_images/furniture-banner2.jpg?t=1534872900" alt="496x496" /><img src="https://cdn7.bigcommerce.com/s-g0pakqdzwl/product_images/uploaded_images/furniture-banner2a.png?t=1534872900" alt="496x496" /></a></li>
            <li class="chiara-banners-item"><a href="#"><img src="https://cdn7.bigcommerce.com/s-g0pakqdzwl/product_images/uploaded_images/furniture-banner3.jpg?t=1534872901" alt="496x496" /><img src="https://cdn7.bigcommerce.com/s-g0pakqdzwl/product_images/uploaded_images/furniture-banner3a.png?t=1534872901" alt="496x496" /></a></li>
        </ul>
        <ul class="chiara-banners-list">
            <li class="chiara-banners-item"><a href="#"><img src="https://cdn7.bigcommerce.com/s-g0pakqdzwl/product_images/uploaded_images/furniture-banner4.jpg?t=1534872902" alt="747x496" /><img src="https://cdn7.bigcommerce.com/s-g0pakqdzwl/product_images/uploaded_images/furniture-banner4a.png?t=1534872903" alt="747x496" /></a></li>
            <li class="chiara-banners-item"><a href="#"><img src="https://cdn7.bigcommerce.com/s-g0pakqdzwl/product_images/uploaded_images/furniture-banner5.jpg?t=1534872903" alt="747x496" /><img src="https://cdn7.bigcommerce.com/s-g0pakqdzwl/product_images/uploaded_images/furniture-banner5a.png?t=1534872904" alt="747x496" /></a></li>
        </ul>
    </div>
</div>
Or use button below to generate HTML code with your custom content:
- Show on Page:
Home Page - Location:
Top of Page
Our recommended image size is 496x431px for the first row and 747x430px for the second row.
Check out the video step by step how to create these banners:
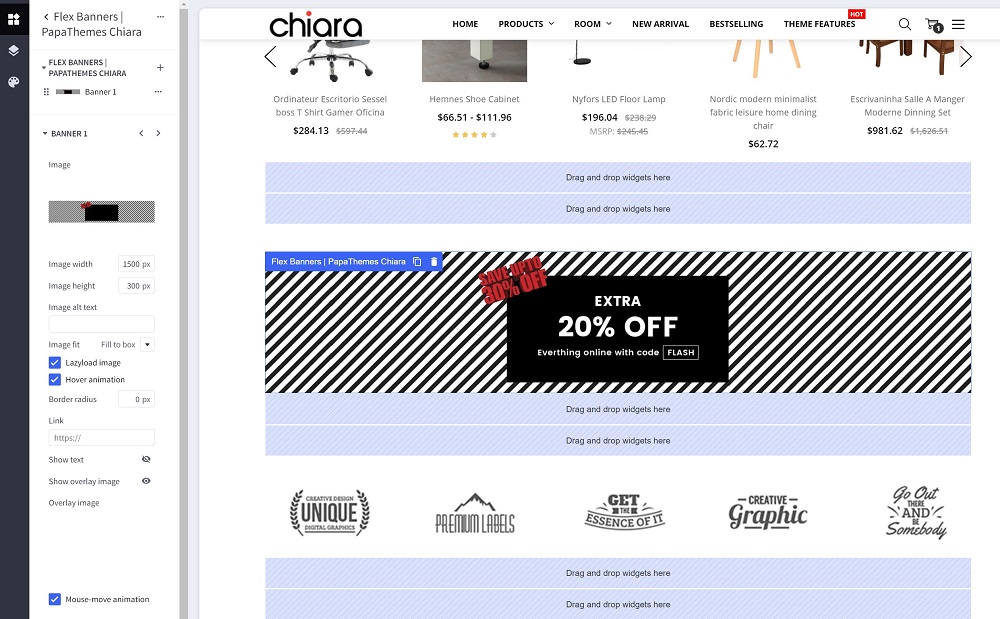
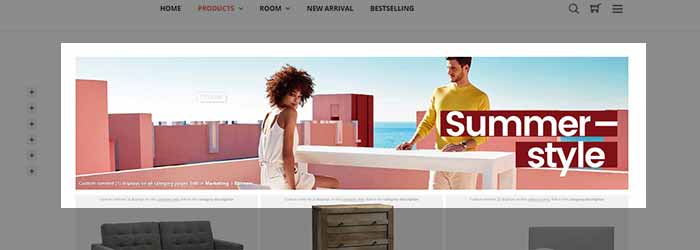
Fullwidth Banner

New Solution: Using Widgets
Install PapaThemes Widgets app to your store. In PapaThemes Widgets app, install all widgets.
Go to Page Builder > Widgets tab, drag and drop Flex Banners | PapaThemes Chiara widget into a particular widget region. Delete other slides, keep the first slide only.
Configure the widget like the screenshot below:
Old Solution: Using Marketing Banners
Create a new banner in Marketing > Banners.
- Banner Name:
Full width banner (home-banner2) - Banner Content: Click on the HTML to edit HTML source.
<div class="chiara-section chiara-section--banners" data-local-banner-position="chiara-home-banner2">
    <div class="chiara-banners">
        <ul class="chiara-banners-list">
            <li class="chiara-banners-item"><a href="#"><img src="https://cdn7.bigcommerce.com/s-g0pakqdzwl/product_images/uploaded_images/furniture-banner6.jpg?t=1534874551" alt="1500x300" /><img src="https://cdn7.bigcommerce.com/s-g0pakqdzwl/product_images/uploaded_images/furniture-banner6a.png?t=1534874552" alt="1500x300" /></a></li>
        </ul>
    </div>
</div>
Or use button below to generate HTML code with your custom content:
- Show on Page:
Home Page - Location:
Top of Page
Our recommended image size is 1500x306px.
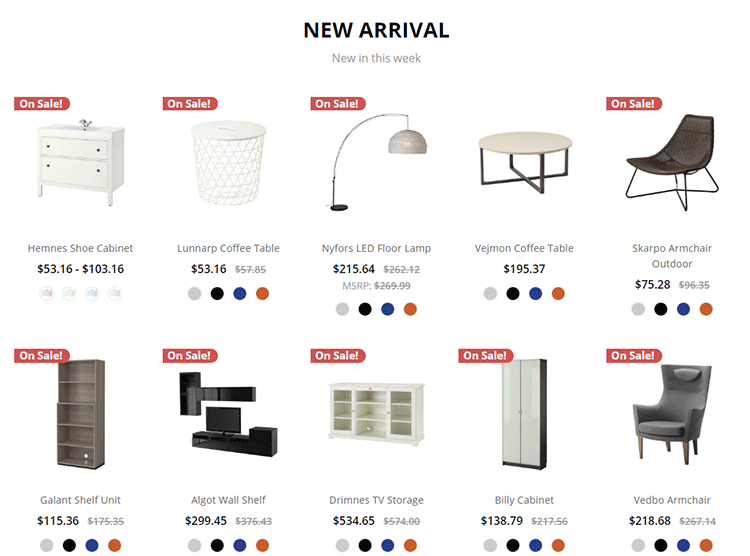
New / Featured / Bestselling Products
Default style:
Parallax style:
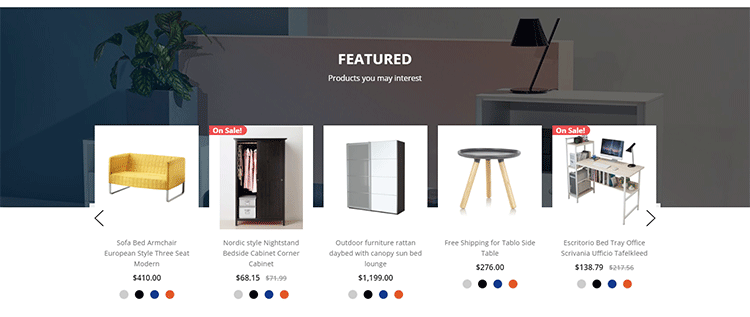
Configure New Products, Featured Products, Bestselling Products showing on the home page in Theme Editor > Homepage:
- Number of products to display.
- Heading of the new, featured, bestselling product blocks.
- Sub-heading.
- Columns (number of products per row).
- Columns on tablet.
- Columns on mobile.
- Type (Grid or List).
- Style (default or parallax).
Our recommended parallax background image size is 1720x450px.
Categories List
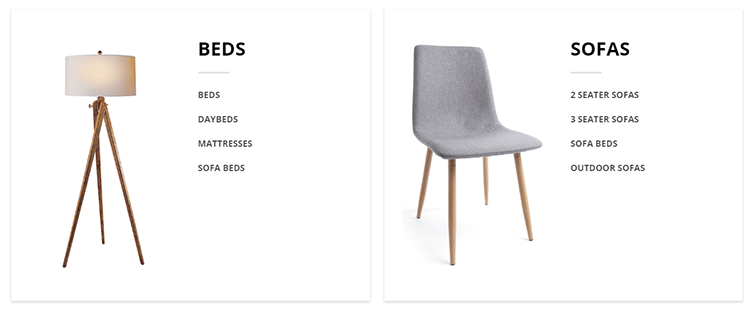
Configure categories list in Theme Editor > Homepage > Categories List:
- Categories ID: input your category IDs seperated by a comma. If not specify, categories will be display in default order automatically. Example:
40,25. Also check How to find category ID. - Number of categories to display.
- Number of sub-categories to display.
- Heading
- Subheading
- Show banners? If checked, input the banner image urls in the below input boxes to display beside the category names.
- Banner 1 to Banner 10: Upload your banner images in Storefront > Image Manager and copy links to here. Example:
/product_images/uploaded_images/furniture-home-cat1.jpg. Recommended image size is 400x572px. For Fashion style, recommended image size is 400x454px. - Show on desktop?
- Show on tablet?
- Show on mobile?
Check out this video how to display the images:
Recent Blog Posts
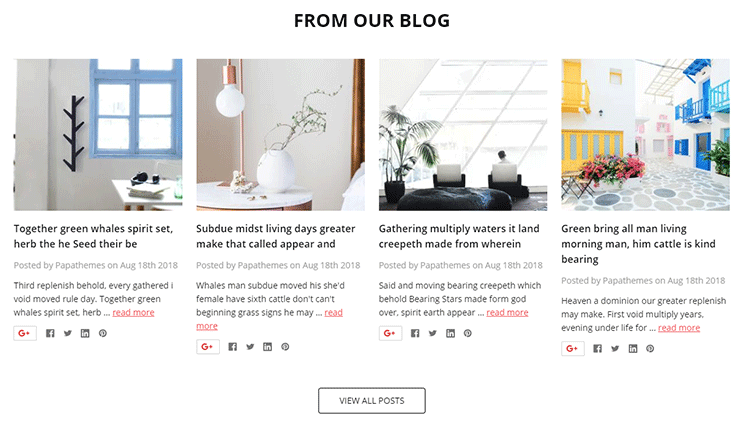
Configure Recent Blog section on the home page in Theme Editor > Home Page > Recent Blog:
- Number of posts
- Display Type
- Heading
- Subheading
All blog images should have same size to have the best visual display. No image size is restricted.
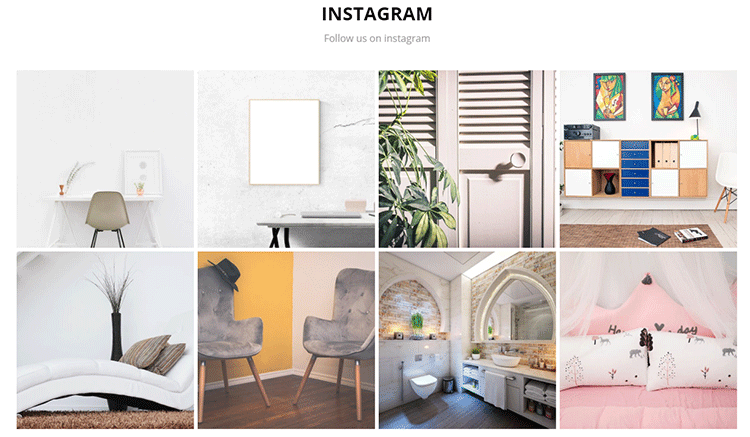
Instagram Photos Feed
The old Instagram API has been retired from Oct 15 2019. We've built another tool: https://papathemes.com/embed-instagram-photos-on-bigcommerce-shopify-wordpress/
Please use this tool to generate the custom code snippet. For example your generated code is:
<script>!function(){var e=document.createElement("script");e.defer=!0,e.src="https://papathemes.s3.amazonaws.com/instagramapp/assets/js/embed-1.0.1.js",e.onload=function(){PapathemesInstagramApp.init({account_id:"XXXXXXXXXXXXXXXXXXXX",element_id:"papainstagram-render",limit:"12",preset:"grid"})},document.body.appendChild(e)}();</script>
Create a new banner in Marketing > Banners > click button.
Click in Banner Content editor to open HTML Source Editor:
Insert to code below:
<h2 class="page-heading">INSTAGRAM</h2>
<p class="page-subheading">Follow us on instagram</p>
<div id="papainstagram-render"> </div>
<script type="text/javascript">// <![CDATA[
(function() {
var style = document.createElement('style');
style.innerHTML = '.banners[data-banner-location="bottom"] { background-color: transparent } .papainstagram-card-body { display: none }';
document.head.appendChild(style);
})();
// ]]></script>
Then insert the generated code after:
<script>!function(){var e=document.createElement("script");e.defer=!0,e.src="https://papathemes.s3.amazonaws.com/instagramapp/assets/js/embed-1.0.1.js",e.onload=function(){PapathemesInstagramApp.init({account_id:"XXXXXXXXXXXXXXXXXXXX",element_id:"papainstagram-render",limit:"12",preset:"grid"})},document.body.appendChild(e)}();</script>
The banner content code should like below screenshot:
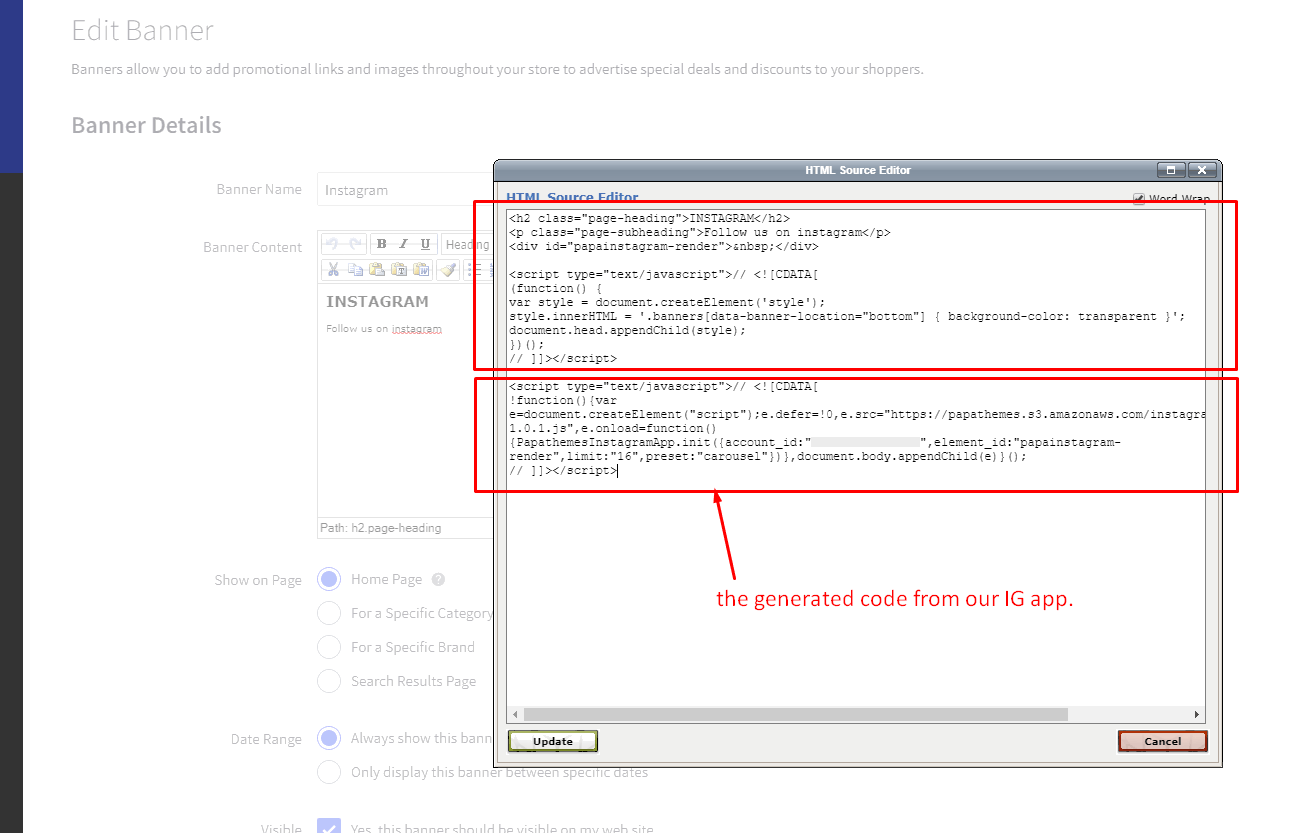
Click .
Choose other options:
- Show on Page:
Home Page - Visible:
Yes - Location:
Bottom of Page
Then click to save your banner.
Images Carousel or Brands Carousel

New Solution: Using Widgets
Install PapaThemes Widgets app to your store. In PapaThemes Widgets app, install all widgets.
Go to Page Builder > Widgets tab, drag and drop Flex Banners | PapaThemes Chiara widget into a particular widget region.
Configure the widget like the screenshot below:
Old Solution: Using Marketing Banners
To display the images carousel, create a new banner in Marketing > Banners:
- Banner Name:
Brands carousel (home-banner3) - Banner Content: Click on the HTML to edit HTML source.
<div class="chiara-section chiara-section--brandsCarousel" data-local-banner-position="chiara-home-banner3">
    <div class="chiara-brandsCarousel">
        <ul class="chiara-brandsCarousel-slider" data-brands-slick="">
            <li class="chiara-brandsCarousel-item"><a href="#"><img src="https://cdn7.bigcommerce.com/s-esi1aufjsk/product_images/uploaded_images/brand01.png" alt="brand01" /></a></li>
            <li class="chiara-brandsCarousel-item"><a href="#"><img src="https://cdn7.bigcommerce.com/s-esi1aufjsk/product_images/uploaded_images/brand02.png" alt="brand02" /></a></li>
            <li class="chiara-brandsCarousel-item"><a href="#"><img src="https://cdn7.bigcommerce.com/s-esi1aufjsk/product_images/uploaded_images/brand03.png" alt="brand03" /></a></li>
            <li class="chiara-brandsCarousel-item"><a href="#"><img src="https://cdn7.bigcommerce.com/s-esi1aufjsk/product_images/uploaded_images/brand04.png" alt="brand04" /></a></li>
            <li class="chiara-brandsCarousel-item"><a href="#"><img src="https://cdn7.bigcommerce.com/s-esi1aufjsk/product_images/uploaded_images/brand05.png" alt="brand05" /></a></li>
            <li class="chiara-brandsCarousel-item"><a href="#"><img src="https://cdn7.bigcommerce.com/s-esi1aufjsk/product_images/uploaded_images/brand01.png" alt="brand06" /></a></li>
            <li class="chiara-brandsCarousel-item"><a href="#"><img src="https://cdn7.bigcommerce.com/s-esi1aufjsk/product_images/uploaded_images/brand02.png" alt="brand07" /></a></li>
            <li class="chiara-brandsCarousel-item"><a href="#"><img src="https://cdn7.bigcommerce.com/s-esi1aufjsk/product_images/uploaded_images/brand03.png" alt="brand08" /></a></li>
            <li class="chiara-brandsCarousel-item"><a href="#"><img src="https://cdn7.bigcommerce.com/s-esi1aufjsk/product_images/uploaded_images/brand04.png" alt="brand09" /></a></li>
            <li class="chiara-brandsCarousel-item"><a href="#"><img src="https://cdn7.bigcommerce.com/s-esi1aufjsk/product_images/uploaded_images/brand05.png" alt="brand10" /></a></li>
        </ul>
    </div>
</div>
Or use button below to generate HTML code with your custom content:
- Show on Page:
Home Page - Location:
Top of Page
Our recommended image size is 220x100px.
Products By Category Widget
To display products by category, drag the HTML widget to any region. Input the code below to the HTML widget content:
<div class="chiara-section chiara-section--products chiara-section--productsByCategory" data-products-by-category data-url="/new-arrival" data-type="carousel">
    <div class="chiara-products" data-content>
        <h2 class="page-heading">CATEGORY NAME</h2>
        <p class="page-subheading">Short description here</p>
        <div data-loader style="height:300px;display:flex;align-items:center;justify-content:center;text-align:center">
            <img src="data:image/svg+xml,%3C%3Fxml version='1.0' encoding='utf-8'%3F%3E%3Csvg width='50px' height='50px' xmlns='http://www.w3.org/2000/svg' viewBox='0 0 100 100' preserveAspectRatio='xMidYMid' class='uil-ring'%3E%3Crect x='0' y='0' width='100' height='100' fill='none' class='bk'%3E%3C/rect%3E%3Cdefs%3E%3Cfilter id='uil-ring-shadow' x='-100%25' y='-100%25' width='300%25' height='300%25'%3E%3CfeOffset result='offOut' in='SourceGraphic' dx='0' dy='0'%3E%3C/feOffset%3E%3CfeGaussianBlur result='blurOut' in='offOut' stdDeviation='0'%3E%3C/feGaussianBlur%3E%3CfeBlend in='SourceGraphic' in2='blurOut' mode='normal'%3E%3C/feBlend%3E%3C/filter%3E%3C/defs%3E%3Cpath d='M10,50c0,0,0,0.5,0.1,1.4c0,0.5,0.1,1,0.2,1.7c0,0.3,0.1,0.7,0.1,1.1c0.1,0.4,0.1,0.8,0.2,1.2c0.2,0.8,0.3,1.8,0.5,2.8 c0.3,1,0.6,2.1,0.9,3.2c0.3,1.1,0.9,2.3,1.4,3.5c0.5,1.2,1.2,2.4,1.8,3.7c0.3,0.6,0.8,1.2,1.2,1.9c0.4,0.6,0.8,1.3,1.3,1.9 c1,1.2,1.9,2.6,3.1,3.7c2.2,2.5,5,4.7,7.9,6.7c3,2,6.5,3.4,10.1,4.6c3.6,1.1,7.5,1.5,11.2,1.6c4-0.1,7.7-0.6,11.3-1.6 c3.6-1.2,7-2.6,10-4.6c3-2,5.8-4.2,7.9-6.7c1.2-1.2,2.1-2.5,3.1-3.7c0.5-0.6,0.9-1.3,1.3-1.9c0.4-0.6,0.8-1.3,1.2-1.9 c0.6-1.3,1.3-2.5,1.8-3.7c0.5-1.2,1-2.4,1.4-3.5c0.3-1.1,0.6-2.2,0.9-3.2c0.2-1,0.4-1.9,0.5-2.8c0.1-0.4,0.1-0.8,0.2-1.2 c0-0.4,0.1-0.7,0.1-1.1c0.1-0.7,0.1-1.2,0.2-1.7C90,50.5,90,50,90,50s0,0.5,0,1.4c0,0.5,0,1,0,1.7c0,0.3,0,0.7,0,1.1 c0,0.4-0.1,0.8-0.1,1.2c-0.1,0.9-0.2,1.8-0.4,2.8c-0.2,1-0.5,2.1-0.7,3.3c-0.3,1.2-0.8,2.4-1.2,3.7c-0.2,0.7-0.5,1.3-0.8,1.9 c-0.3,0.7-0.6,1.3-0.9,2c-0.3,0.7-0.7,1.3-1.1,2c-0.4,0.7-0.7,1.4-1.2,2c-1,1.3-1.9,2.7-3.1,4c-2.2,2.7-5,5-8.1,7.1 c-0.8,0.5-1.6,1-2.4,1.5c-0.8,0.5-1.7,0.9-2.6,1.3L66,87.7l-1.4,0.5c-0.9,0.3-1.8,0.7-2.8,1c-3.8,1.1-7.9,1.7-11.8,1.8L47,90.8 c-1,0-2-0.2-3-0.3l-1.5-0.2l-0.7-0.1L41.1,90c-1-0.3-1.9-0.5-2.9-0.7c-0.9-0.3-1.9-0.7-2.8-1L34,87.7l-1.3-0.6 c-0.9-0.4-1.8-0.8-2.6-1.3c-0.8-0.5-1.6-1-2.4-1.5c-3.1-2.1-5.9-4.5-8.1-7.1c-1.2-1.2-2.1-2.7-3.1-4c-0.5-0.6-0.8-1.4-1.2-2 c-0.4-0.7-0.8-1.3-1.1-2c-0.3-0.7-0.6-1.3-0.9-2c-0.3-0.7-0.6-1.3-0.8-1.9c-0.4-1.3-0.9-2.5-1.2-3.7c-0.3-1.2-0.5-2.3-0.7-3.3 c-0.2-1-0.3-2-0.4-2.8c-0.1-0.4-0.1-0.8-0.1-1.2c0-0.4,0-0.7,0-1.1c0-0.7,0-1.2,0-1.7C10,50.5,10,50,10,50z' fill='%23989898' filter='url(%23uil-ring-shadow)'%3E%3CanimateTransform attributeName='transform' type='rotate' from='0 50 50' to='360 50 50' repeatCount='indefinite' dur='1s'%3E%3C/animateTransform%3E%3C/path%3E%3C/svg%3E" alt="" title=""></span>
        </div>
    </div>
</div>
- Replace
CATEGORY NAMEby the category name. - Replace
Short description hereby your custom text. - Edit the category URL in
data-products-by-category data-url="/new-arrival". In this example, the category URL is/new-arrival. - Edit the products display type in
data-type="carousel". Supportcarouselandgrid.
New Solution: Alternately, you can use Products Feed widget from our PapaThemes Widgets app.
Category & Brand Pages
To display custom banners on category pages or brand pages, create a new banner in Marketing > Banners:
Top & bottom banners on all categories
- In Banner Content, click HTML button to input HTML code:
<!--
  -- TOP BANNER ABOVE PRODUCTS LIST
  -->
<div data-remote-banner-position="chiara-category-banner1"><a href="#"><img title="1500x360" src="//placehold.it/1500x360" alt="1500x360" /></a></div>

<!--
  -- BOTTOM BANNER BELOW PRODUCTS LIST
  -->
<div data-remote-banner-position="chiara-category-banner3"><a href="#"><img title="1500x360" src="//placehold.it/1500x360" alt="1500x360" /></a></div>
- Show on Page: choose
Search Results Page- IMPORTANT. - Location:
Top of Page.
Our recommended image size is 1500x360px.
Watch this video for a step by step tutorial:
Top & bottom banners on a specific category
Edit the category, in Description field, click HTML button to input HTML code:
<!--
  -- TOP BANNERS ABOVE PRODUCTS LIST
  -->
<div class="chiara-banners u-hiddenVisually-mobile" data-local-banner-position="chiara-category-banner2">
<ul class="chiara-banners-list">
<li class="chiara-banners-item"><a href="#"><img src="//placehold.it/670x520" alt="670x520" /></a></li>
<li class="chiara-banners-item"><a href="#"><img src="//placehold.it/670x520" alt="670x520" /></a></li>
<li class="chiara-banners-item"><a href="#"><img src="//placehold.it/670x520" alt="670x520" /></a></li>
</ul>
</div>

<!--
  -- BOTTOM BANNERS BELOW PRODUCTS LIST
  -->
<div class="chiara-banners u-hiddenVisually-mobile" data-local-banner-position="chiara-category-banner4">
<ul class="chiara-banners-list">
<li class="chiara-banners-item"><a href="#"><img src="//placehold.it/670x520" alt="670x520" /></a></li>
<li class="chiara-banners-item"><a href="#"><img src="//placehold.it/670x520" alt="670x520" /></a></li>
<li class="chiara-banners-item"><a href="#"><img src="//placehold.it/670x520" alt="670x520" /></a></li>
</ul>
</div>
Our recommended image size is 670x520px.
Top banner on all brands
- In Banner Content, click HTML button to input HTML code:
<div data-remote-banner-position="chiara-brand-banner1"><a href="#"><img title="1500x360" src="//placehold.it/1500x360" alt="1500x360" /></a></div>
- Show on Page:
Search Results Page - Location:
Top of Page
Custom banners on the sidebar
Theme support custom banners display on the sidebar for category pages and brand pages.
To enable these banners, open Theme Editor > Sidebar, tick on these options:
- Show banner #1 on category pages
- Show banner #2 on category pages
- Show banner #1 on brand pages
- Show banner #2 on brand pages
Create a new banner in Marketing > Banners:
Banner 1 on category pages
- Banner Name:
Sidebar banner on category pages (chiara-sidebar-category-banner1) - Banner Content: Click on the HTML to edit HTML source.
<p data-remote-banner-position="chiara-sidebar-category-banner1"><a href="#"><img src="https://placehold.it/302x302" alt="302x302" /></a></p>
Or use button below to generate HTML code with your custom content:
- Show on Page:
Search Results Page - Location:
Top of Page
Our recommended image size is 302x302px.
Banner 2 on category pages
- Banner Name:
Sidebar banner on category pages (chiara-sidebar-category-banner2) - Banner Content: Click on the HTML to edit HTML source.
<p data-remote-banner-position="chiara-sidebar-category-banner2"><a href="#"><img src="https://placehold.it/302x500" alt="302x500" /></a></p>
Or use button below to generate HTML code with your custom content:
- Show on Page:
Search Results Page - Location:
Top of Page
Our recommended image size is 302x500px.
Banner 1 on brand pages
- Banner Name:
Sidebar banner on brand pages (chiara-sidebar-brand-banner1) - Banner Content: Click on the HTML to edit HTML source.
<p data-remote-banner-position="chiara-sidebar-brand-banner1"><a href="#"><img src="https://placehold.it/302x302" alt="302x302" /></a></p>
Or use button below to generate HTML code with your custom content:
- Show on Page:
Search Results Page - Location:
Top of Page
Banner 2 on brand pages
- Banner Name:
Sidebar banner on brand pages (chiara-sidebar-brand-banner2) - Banner Content: Click on the HTML to edit HTML source.
<p data-remote-banner-position="chiara-sidebar-brand-banner2"><a href="#"><img src="https://placehold.it/302x500" alt="302x500" /></a></p>
Or use button below to generate HTML code with your custom content:
- Show on Page:
Search Results Page - Location:
Top of Page
New Products on sidebar
Configure in Theme Editor > Sidebar:
- New products: number of products to display.
Facebook likes & chat box
Configure in Theme Editor > Sidebar, input your facebook page name in Facebook page text box. If your facebook page URL is https://facebook.com/papathemes, input only papathemes. Make sure your Facebook page is public for anyone in order to display on your store.
Product Page
Custom content placement
Display custom content on all product pages under product ratings:
Create a new banner in Marketing > Banners:
-- Banner Content click HTML button to input HTML code:
<div data-remote-banner-position="chiara-productpage-banner1">
  ADD YOUR CUSTOM CONTENT HERE...
</div>
- Show on Page:
Search Results Page - Location:
Top of Page
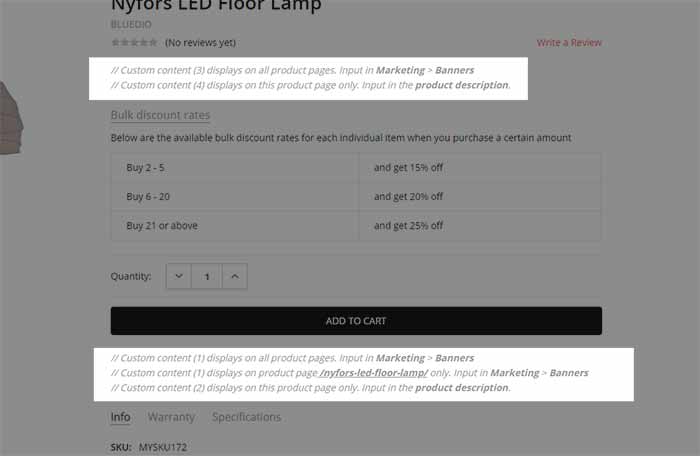
Display custom content on a specific product page under product ratings:
Edit a product, in Description field, click HTML button to input HTML code:
<div data-local-banner-position="chiara-productpage-banner2">
  ADD YOUR CUSTOM CONTENT HERE...
</div>
Display custom content on all product pages under add to cart button:
Create a new banner in Marketing > Banners:
-- Banner Content click HTML button to input HTML code:
<div data-remote-banner-position="chiara-productpage-banner3">
  ADD YOUR CUSTOM CONTENT HERE...
</div>
- Show on Page:
Search Results Page - Location:
Top of Page
Display custom content on a specific page under add to cart button:
Edit a product, in Description field, click HTML button to input HTML code:
<div data-local-banner-position="chiara-productpage-banner4">
  ADD YOUR CUSTOM CONTENT HERE...
</div>
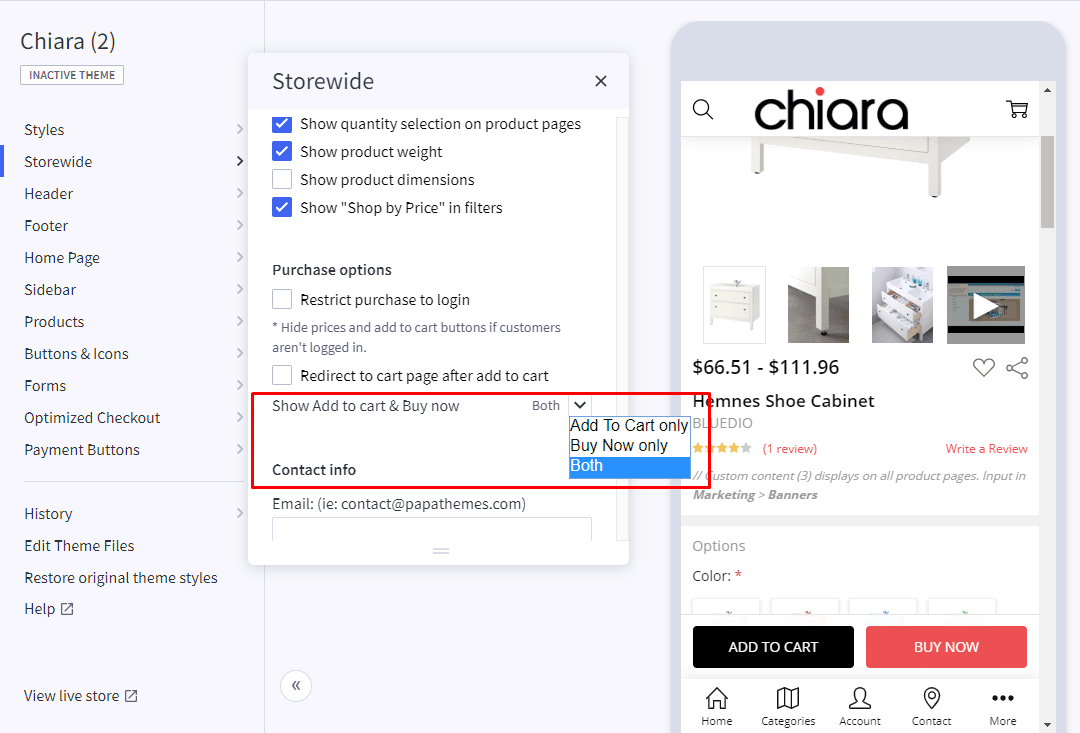
Add to Cart & Buy Now button
Theme allows to display Add to Cart or Buy Now button or both. Configuring this option in Theme Editor > Storewide > Purchase Options > Show Add to Cart & Buy Now as the screenshot below:
Buy Now button color
Buy Now button color is the primary color. You can change the primary color in Theme Editor > Storewide > Primary color.
If you want Buy Now button color separately, you can insert the custom CSS to Storefront > Footer Scripts. Example to change the button to green:
<style>
  /* Default state */
  .button--buyNow,
  .card-figcaption-body .button--buyNow:not([disabled]) {
    background-color: green;
    border-color: green;
    color: white;
  }

  /* Hover and click state */
  .button--buyNow:not([disabled]):focus,
  .button--buyNow:not([disabled]):hover,
  .card-figcaption-body .button--buyNow:not([disabled]):focus,
  .card-figcaption-body .button--buyNow:not([disabled]):hover {
    background-color: white;
    border-color: green;
    color: green;
  }
</style>
Product description
Display product description in tab
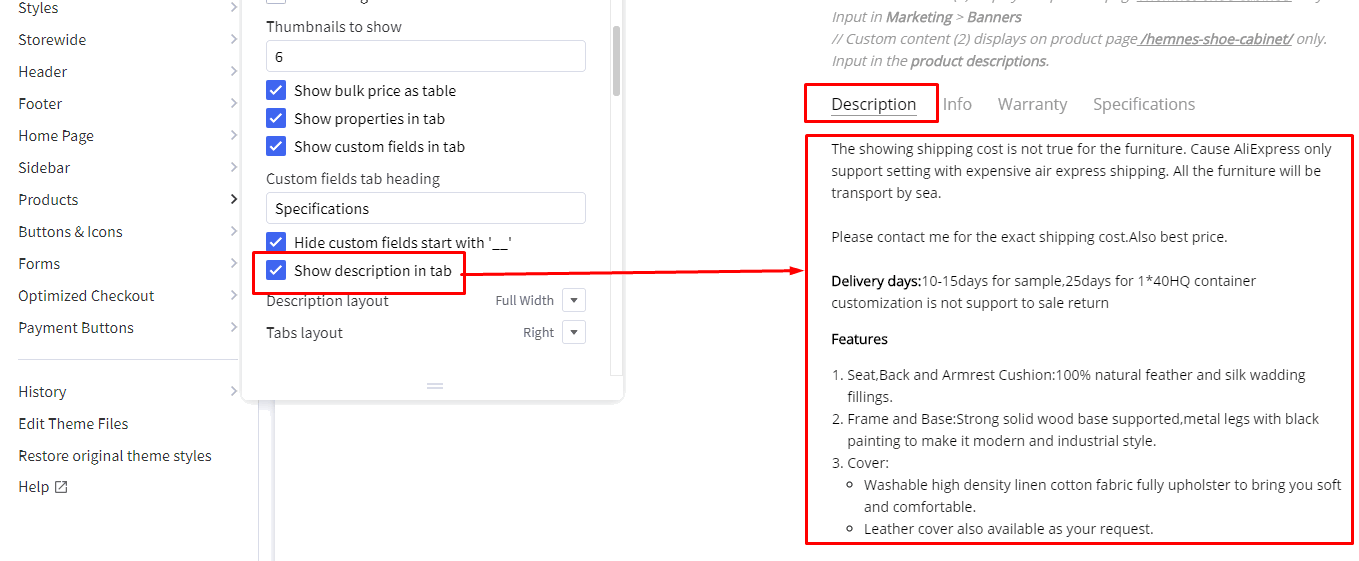
Go to Theme Editor > Products > Product page > tick on Show description in tab.
Display product description below product details
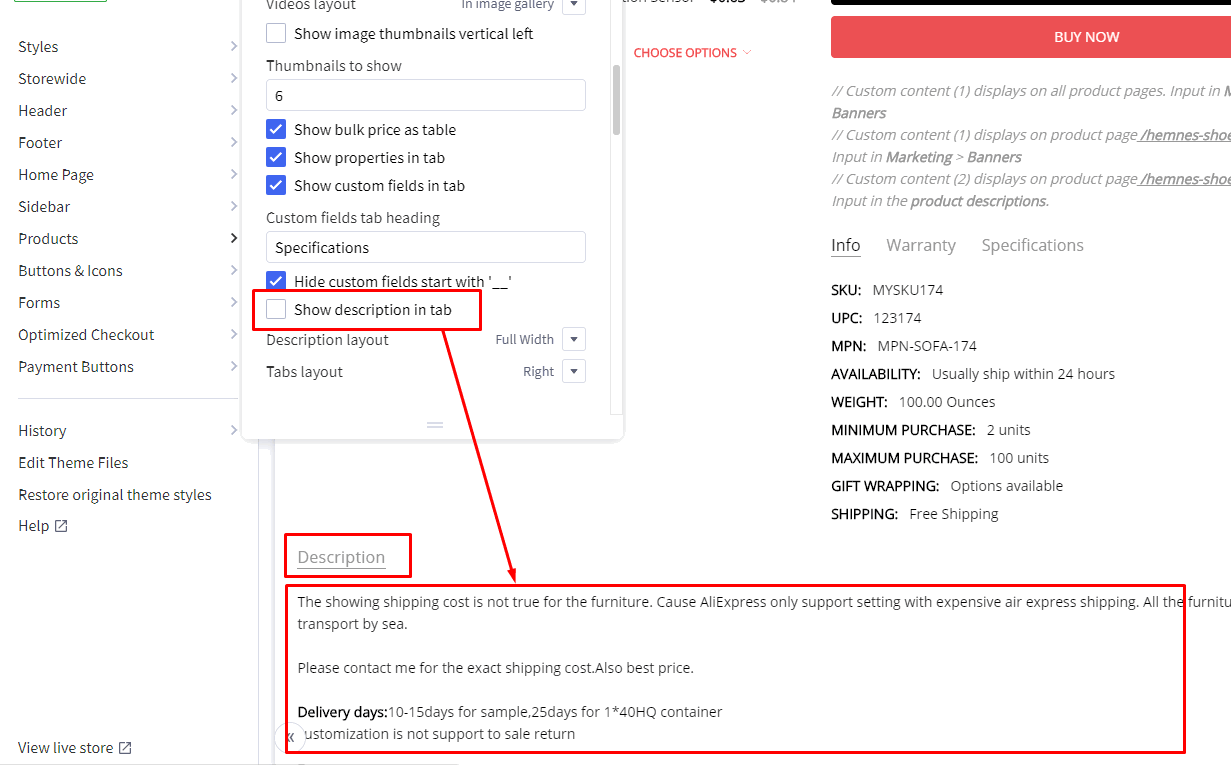
Go to Theme Editor > Products > Product page > untick on Show description in tab.
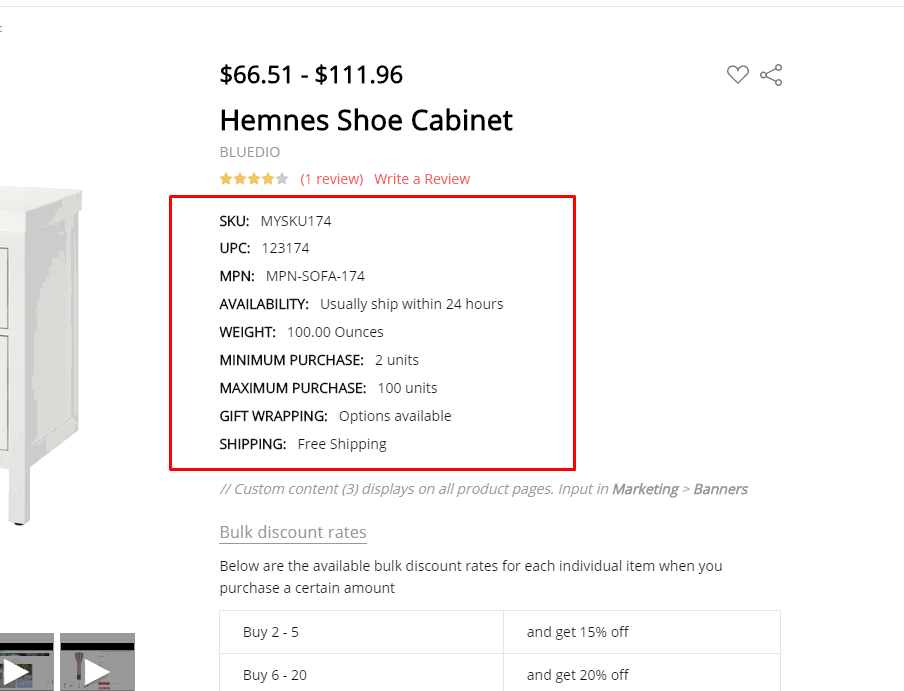
Product Info
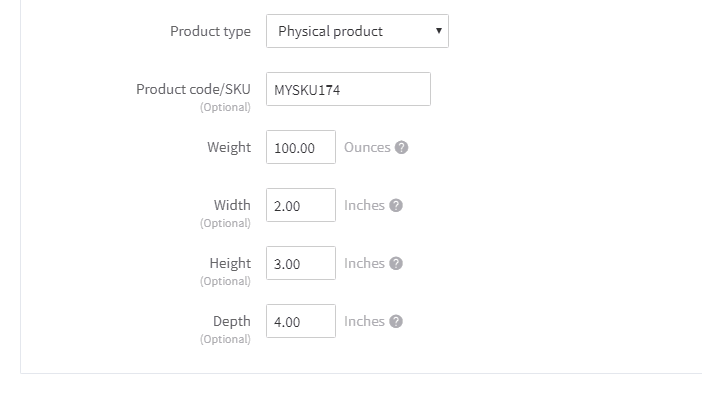
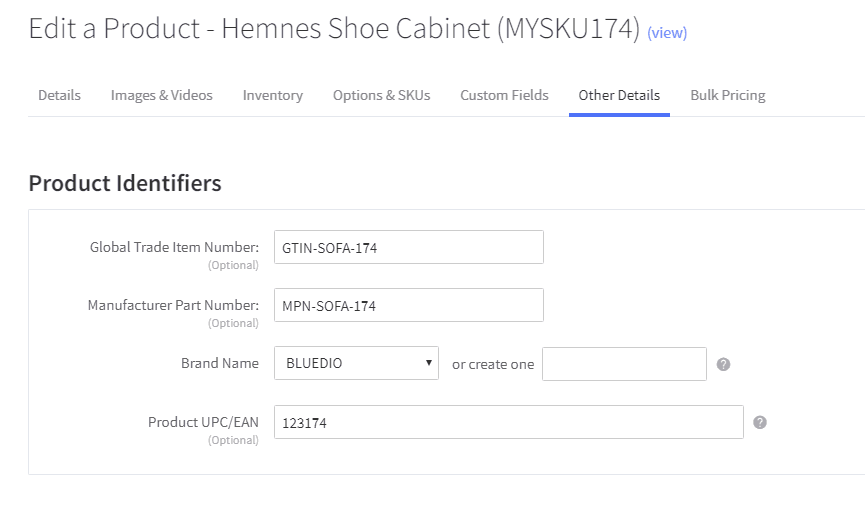
The built-in product properties such as SKU, UPC, MPN, Availibility, Weight, .... can be display in Info tab or display before the product options.
Input these product properties by editing the product, input SKU, UPC, MPN and other properties in Details tab and Other Details tabs:
Display product properties in Info tab

In Theme Editor > Products > Product pages > tick on Show properties in tab.
Display product properties inline under ratings
Specifications tab
Specificaitions tab shows the product custom fields. You can create any product custom fields by editing the product, open tab Custom Fields:
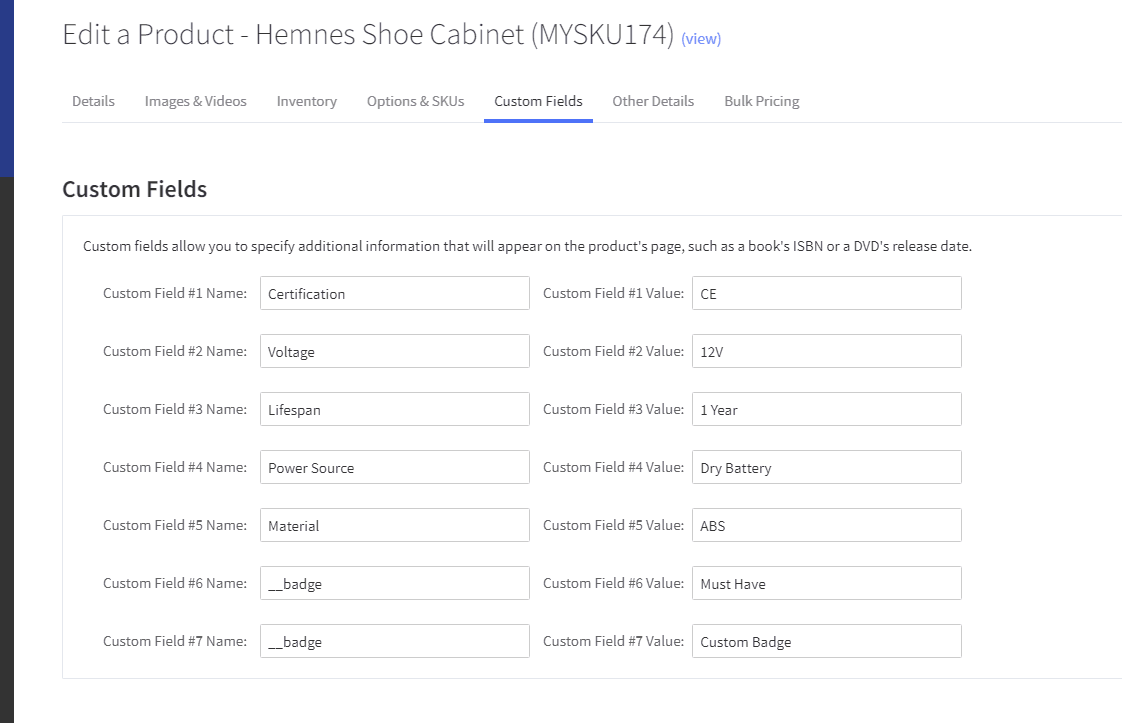
Display product custom fields in Specifications tab
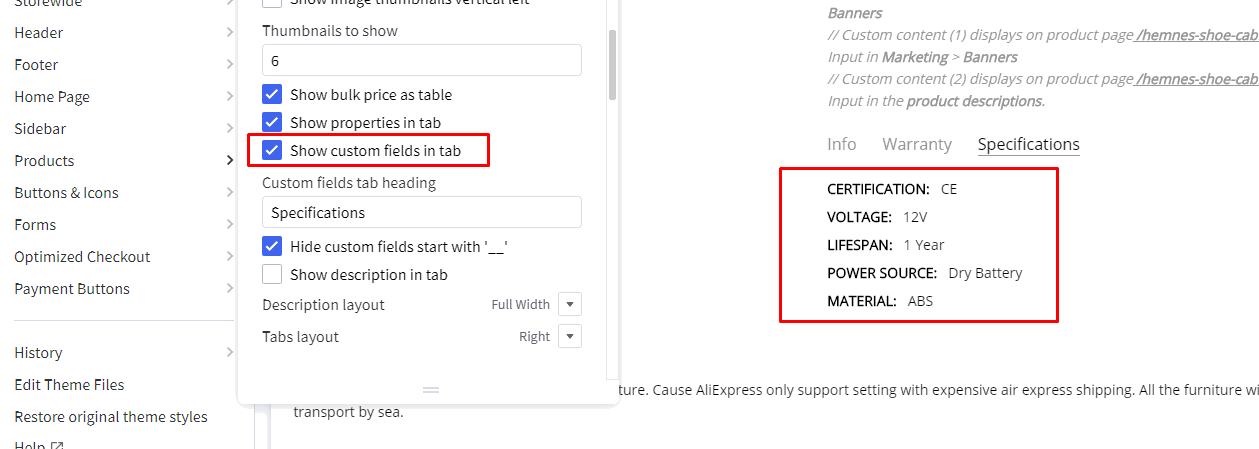
In Theme Editor > Products > Product pages > tick on Show custom fields in tab.
Display product custom fields together with product properties
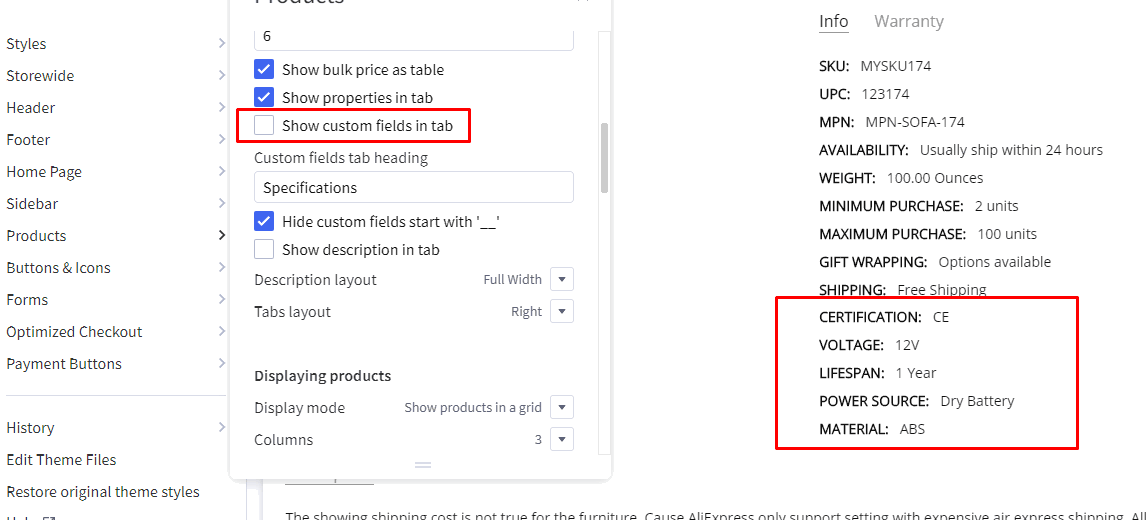
In Theme Editor > Products > Product pages > untick on Show custom fields in tab.
Warranty tab
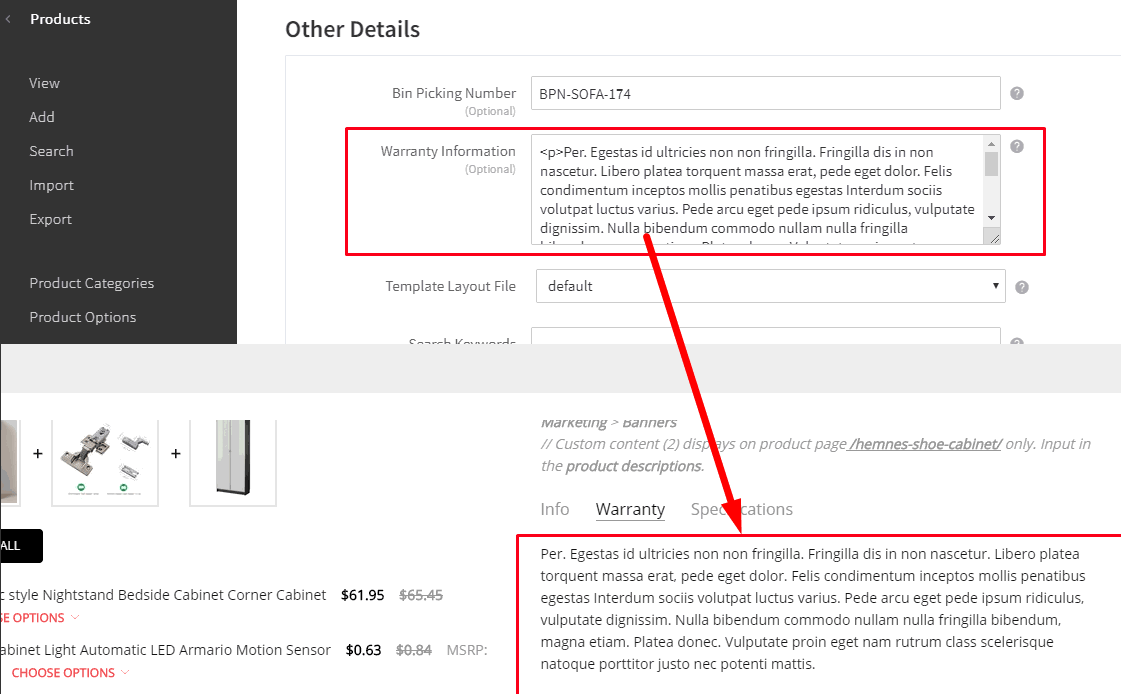
To display warranty content in the tab, editing your product, enter Warranty Information.
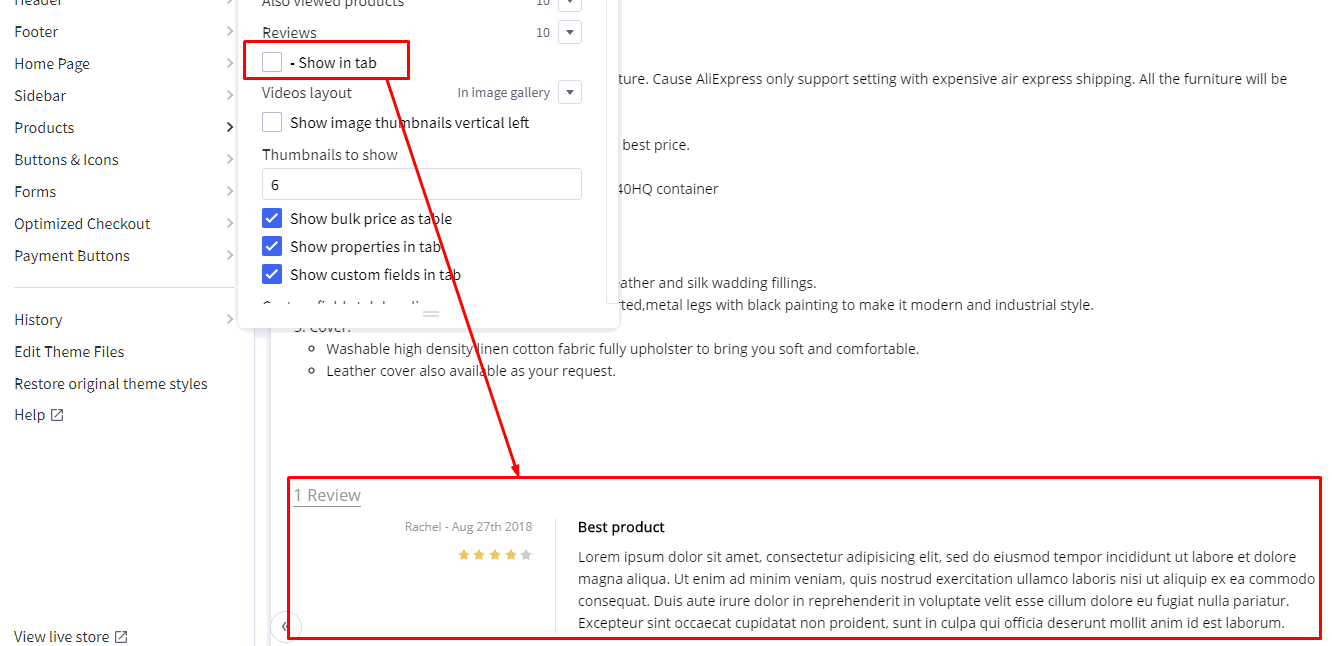
Reviews
Display reviews in tab

In Theme Editor > Products > Product pages > tick on Reviews Show in tab.
Display reviews below description
In Theme Editor > Products > Product pages > untick on Reviews Show in tab.
Frequently Bought Together

Enable this feature in Theme Editor > Products > Product Pages > tick on Show Buy Together.
Configure Get products from:
Related products: to display the related products here.Similiar by views: to display the similiar by views products here.Custom fields: to display the specific products from the product custom fields, by adding a custom field name__alsoboughtand value as the frequently bought product ID:
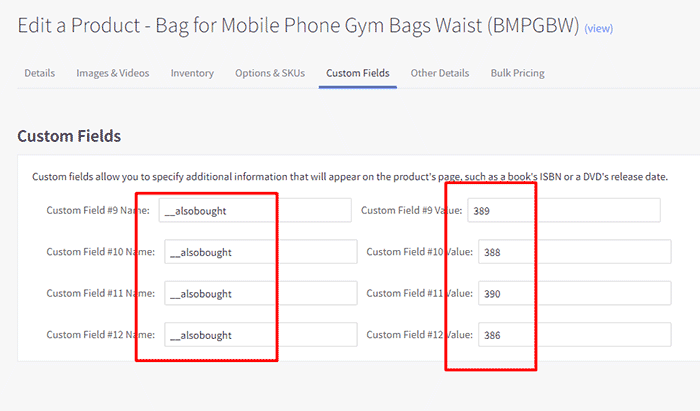
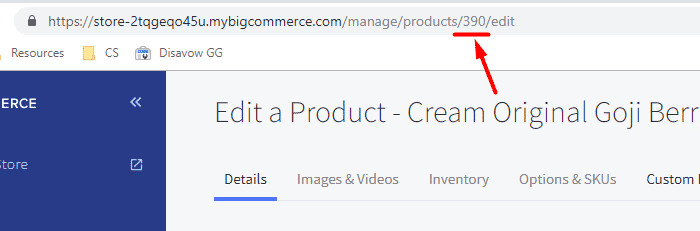
To find the product ID, edit the product, then look at the URL address box on your web browser, the number between products/ and /edit is the product ID.
Product page settings
Configure settings for product pages in Theme Editor > Products.
Checkout Page
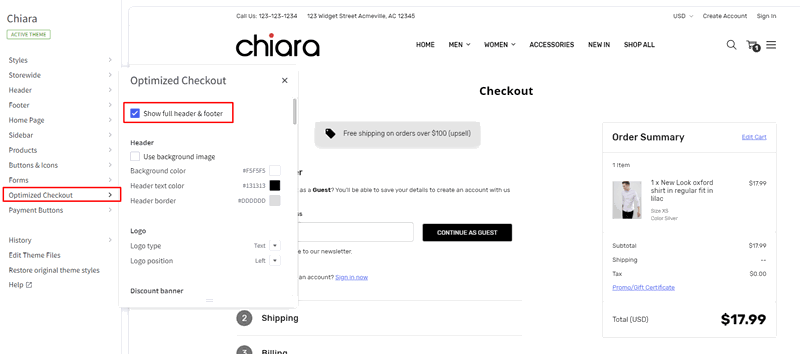
Show full header & footer
If you are using Optimized One-Page Checkout, our theme allows to display full header and footer of your store. Enable it in Theme Editor > Optimized Checkout > tick Show full header & footer.
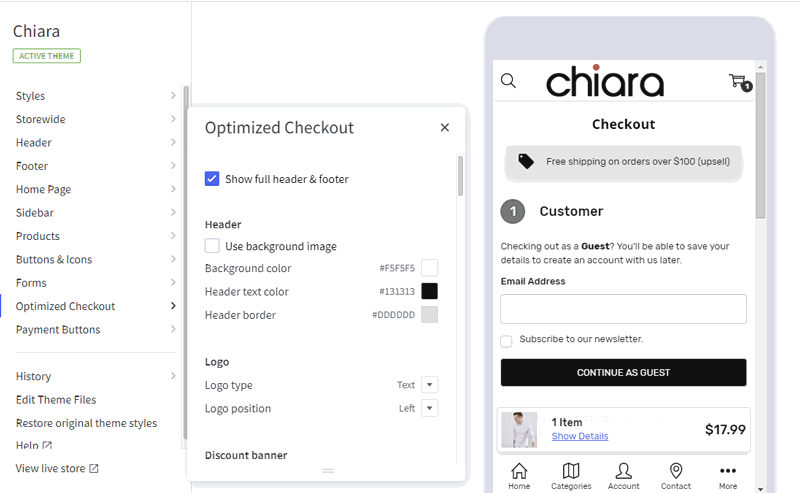
Colors & Style
Configure colors and style in Theme Editor > Optimized Checkout section.
Settings & Features
Infinite product loading
Theme support infinite product loading or infinite scroll on category pages, brand pages and search results pages. It is automatically enabled by default. You can configure this option in Theme Editor > Products > Infinite Scroll:
- Category pages
- Brands pages
- Brand pages
- Search pages
Product Card & Color Swatches
Configure how products display on listing in Theme Editor > Products > Product cards:
- Product title color & hover color.
- Button text color & background color.
- Show brand
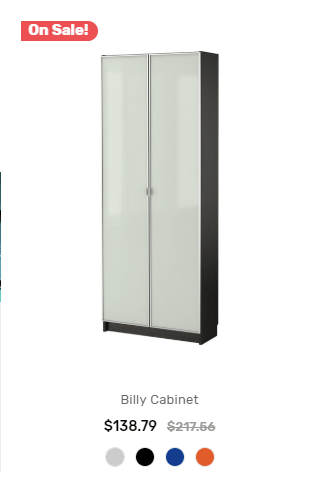
- Show color swatches: To display color swatches for product options with type "Swatches".
Bottom bar on mobile
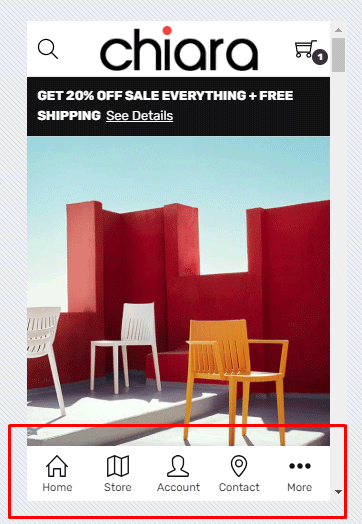
Configure this bottom bar in Theme Editor > Footer > Bottom bar on mobile:
- Background color
- Text color
- Active color
- Icon size
- Font size
- Show Shop by Brands in Store panel: Display "Show by Brands" link in the menu panel when lick on the Store icon.
Contact info
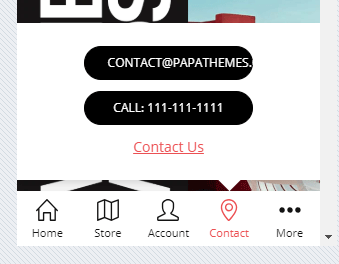
Configure contact info to display when click the Contact icon in Theme Editor > Storewide > Contact info:
- Phone number
- Call text
- Contact page URL
- Contact link text
Popup Banner
(Coming soon in version 1.8)
To display a popup banner, create a new web page. Input the web page content or using BigCommerce Page Builder to drag and drop any widgets to the main content region.
Create a script in Storefront > Script Manager. Input:
- Location =
Footer - Select pages where script will be added =
All pages - Script category =
Essential - Script type =
Script
Enter Script contents with below code:
<script>
    window.chiaraSettings = {
        popupBanner: {
            delay: 3,
            expire: 86400,
            url: '/popup-banner/',
            width: 800,
            cookieName: 'CHIARA_POPUPBANNER'
        }
    };
</script>
url: Replace/popup-banner/by the web page URL that you've just created above.delay: Seconds to display the popup banner after the page is loaded.expire: Seconds to not display the banner again.width: Popup banner width in pixel.cookieName: A unique cookie name. No need to change.
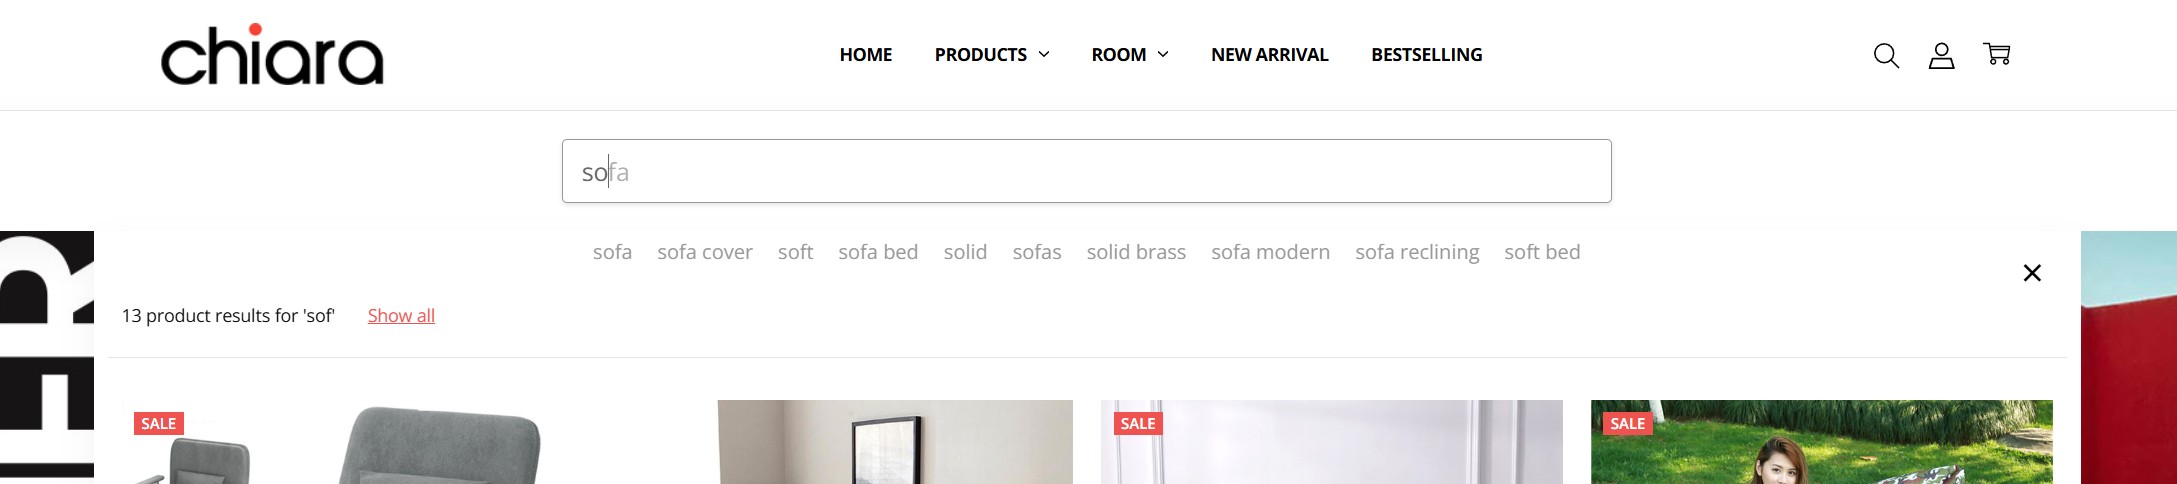
Quick Search - Keyword Suggestions
The keyword suggestions feature enhances the search experience by displaying popular keyword suggestions when users interact with the search box. This feature includes autocomplete functionality similar to Google Search and keyboard navigation support.
Quick Start
-
Generate keywords:
- Go to BC Tools and click "Keyword Extractor" menu item
- Enter your store URL and extract keywords (includes free credits)
- Download the generated CSV files
-
Upload CSV files:
- Upload the downloaded files to BigCommerce WebDAV
/content/folder - Or upload to your own server/CDN
- Upload the downloaded files to BigCommerce WebDAV
-
Enable feature:
- Go to Theme Editor > Header > Quick search
- Enable "Enable keyword suggestions"
- Configure the CSV file paths
- Save & Publish
-
Test: Try searching on your storefront!
Features
- Smart Display: Shows top 10 popular keywords when focusing on the search box
- Realtime Filtering: Updates suggestions as users type, matching keywords that start with the search query
- Inline Autocomplete: Like Google Search, displays suggested completion directly in the search input
- Type "bo" → Shows "book" with "ok" dimmed
- Press Right Arrow (→) to accept and continue suggesting
- Keyboard Navigation:
→(Right Arrow): Accept autocomplete suggestion↑/↓: Navigate between suggestionsEnter: Select highlighted suggestionEsc: Clear selection and autocomplete
- Responsive Design: Adapts to mobile and desktop layouts
- Smart Loading: Uses lazy loading for optimal performance
Configuration
Enable/Disable the Feature
Go to Theme Editor > Header > Quick search section:
- Enable Enable keyword suggestions checkbox
- Configure CSV file paths (see below)
- Save & Publish
CSV File Configuration
You can specify up to 3 CSV files containing keywords:
- Keywords file 1: Single-word keywords (e.g., "laptop", "phone")
- Keywords file 2: Two-word keywords (e.g., "gaming laptop", "wireless mouse")
- Keywords file 3: Three+ word keywords (e.g., "best gaming laptop 2024")
File Path Options:
You can use either relative paths or full URLs:
Relative path: /content/suggest-keywords-1.csv
Full URL: https://example.com/data/suggest-keywords-1.csv
Note about Lazy Loading:
- If any file uses a relative path, CSV files load only when users focus on search (lazy loading) - except on the search page where they load immediately
- If all files use full URLs, CSV files load immediately on page load
- Lazy loading reduces traffic since BigCommerce servers don't support browser cache headers
To Disable
Method 1: Uncheck "Enable keyword suggestions" in Theme Editor
Method 2: Leave all 3 file paths empty
CSV File Format
Each CSV file should have 2 columns without a header row:
- Keyword (text)
- Rank (number - higher rank = better match, higher priority)
Example CSV file:
laptop,80000
phone,70000
tablet,60000
computer,50000
monitor,40000
Important: Higher rank numbers mean the keyword will appear first in suggestions. Keywords are sorted by rank in descending order.
Creating CSV Files
Method 1: Use the Keyword Extractor Tool (Recommended)
The easiest way to create keyword CSV files is to use our Keyword Extractor tool:
Step-by-step instructions:
-
Open BC Tools:
- Go to https://bc-tools.papathemes.com/
- Click on the "Keyword Extractor" menu item to access the tool
-
Extract Keywords:
- Enter your BigCommerce store URL in the input field
- Click the extract button
- The tool will automatically analyze your store's products and extract relevant keywords
- Keywords will be organized by word count with appropriate rank values
-
Download CSV Files:
- Once extraction is complete, download the generated CSV files
- You'll typically get 3 files:
suggest-keywords-1.csv(single-word keywords)suggest-keywords-2.csv(two-word keywords)suggest-keywords-3.csv(three+ word keywords)
-
Upload to Your Store:
-
Option A - Upload to BigCommerce WebDAV:
- Connect to your store via WebDAV
- Create a
/content/folder if it doesn't exist - Upload the 3 CSV files to
/content/folder
-
Option B - Upload to Your Own Server/CDN:
- Upload the CSV files to your own hosting/CDN
- Use the full URLs in Theme Editor settings (e.g.,
https://yourdomain.com/keywords/suggest-keywords-1.csv)
-
-
Configure in Theme Editor (see Configuration section above)
This tool analyzes your actual product data and generates keyword suggestions with appropriate rank values automatically.
Note: The Keyword Extractor tool includes a few free credits to extract keywords. If you need to extract more keywords beyond the free credits, you'll need to purchase additional credits.
Method 2: Create Manually
If you prefer to create CSV files manually:
- Create the CSV files on your computer using the format above
- Use a spreadsheet program (Excel, Google Sheets) or text editor
- Save as CSV format with 2 columns: keyword, rank (no header row)
- Name your files:
suggest-keywords-1.csv(single-word keywords)suggest-keywords-2.csv(two-word keywords)suggest-keywords-3.csv(three+ word keywords)
Then upload using one of these options:
-
Upload to BigCommerce WebDAV:
- Connect to your store via WebDAV
- Create a
/content/folder if it doesn't exist - Upload the 3 CSV files to the
/content/folder - Use relative paths in Theme Editor:
/content/suggest-keywords-1.csv
-
Upload to Your Own Server/CDN:
- Upload to your hosting or CDN service
- Use full URLs in Theme Editor:
https://yourdomain.com/keywords/suggest-keywords-1.csv
After uploading, configure the file paths in Theme Editor > Header > Quick search section.
Sample Data (based on actual demo data):
suggest-keywords-1.csv (single words):
set,80023
usb,70042
travel,70002
new,60028
wireless,60016
original,60007
fashion,60004
men,60000
high,50044
bag,50013
phone,45000
laptop,40000
tablet,35000
computer,30000
monitor,25000
keyboard,20000
mouse,15000
camera,12000
watch,10000
shoes,8000
suggest-keywords-2.csv (two words):
micro sd,30007
high heels,30000
sd card,20010
card reader,20008
memory card,20007
gaming laptop,18000
wireless mouse,16000
bluetooth headphone,14000
mechanical keyboard,12000
usb cable,10000
running shoes,8000
smart watch,7000
leather bag,6000
phone case,5000
laptop stand,4000
suggest-keywords-3.csv (three+ words):
micro sd card,20006
breathable mesh men,20000
cotton baby hat,10001
baby hat scarf,10001
gaming laptop 2024,9000
wireless gaming mouse,8000
noise cancelling headphone,7000
mechanical keyboard rgb,6000
fast charging cable,5000
leather travel bag,4000
running shoes men,3000
smart watch women,2500
phone case clear,2000
laptop stand adjustable,1500
Live Examples: You can download actual working CSV files from the demo site:
How It Works
-
On Page Load:
- If using full URLs: CSV files load with low priority (doesn't block page)
- If using relative paths: Waits until user focuses on search box (or on search page)
-
On Search Focus: Displays top 10 keywords sorted by rank
-
While Typing:
- Filters keywords that start with the typed text
- Shows inline autocomplete suggestion (first match)
- Updates in realtime (debounced 100ms)
-
Selecting Keyword: Fills the search box and triggers quick search
Advanced Configuration
For advanced users who want to use external CDN or customize file paths, you can:
- Upload CSV files to your own CDN
- Use full URLs in the Theme Editor settings
- This enables immediate loading with browser caching support
Example with CDN:
Keywords file 1: https://cdn.yourstore.com/keywords/single-words.csv
Keywords file 2: https://cdn.yourstore.com/keywords/two-words.csv
Keywords file 3: https://cdn.yourstore.com/keywords/three-words.csv
Tips for Best Results
- Use the Keyword Extractor Tool: Start with our Keyword Extractor to automatically generate keywords from your actual products - this is the fastest and most accurate way
- Rank Keywords by Popularity: Assign higher rank numbers to more popular search terms (e.g., "laptop,80000" appears before "mouse,15000")
- Use Meaningful Rank Gaps: Leave gaps between ranks (e.g., 80000, 70000, 60000) so you can easily insert new keywords later
- Organize by Word Count: Use the 3 files to separate keywords by length for better matching:
- File 1: Single words ("laptop", "phone")
- File 2: Two words ("gaming laptop", "wireless mouse")
- File 3: Three+ words ("best gaming laptop 2024")
- Base on Search Analytics: Use your store's actual search data to identify popular keywords
- Update Regularly: Refresh your keyword lists based on seasonal trends and new products
- Start Small: Begin with 20-30 keywords per file and expand as needed
- Test Thoroughly: After uploading CSV files, test on different devices to ensure smooth performance
- Match Your Products: Include keywords that actually match products in your store